Documentation:Streaming HowTo/Easy Streaming Newer Versions
Contents |
Introduction
Since the documentation on streaming is fairly old, this wiki page was written to show how to do streaming on newer versions of VLC Media Player. EDIT: This page looked incomplete, and I figured out a way that worked for me on my particular system, so I thought I'd document it in the hopes that it helps someone else in the future. My setup is as follows:
- Server: Windows Vista Machine running VLC 1.1.11 (IP Address: 192.168.2.2)
- Client: Windows 7 Machine running VLC 1.1.11 (IP Address: 192.168.2.4)
- Two computers are on the same subnet (192.168.2.X). I am able to ping from each machine to the other.
Goal: I have a bunch of video files ripped from DVDs that I want to share between my server and my client(s). This is simply to be able to keep all my movies in one central location.
SERVER SETUP: Streaming using the streaming dialog
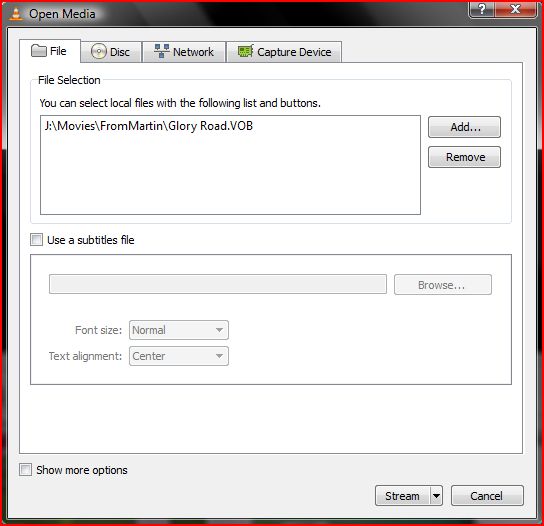
- Launch VLC and then push Media -> Streaming... (You should see a dialog like the one below)
- On the window that pops up click on the tab of the media you want to stream from. I chose to stream from a file (a .vob file). I add this file to the "File Selection" list.
- I left "Use a subtitles file" unchecked
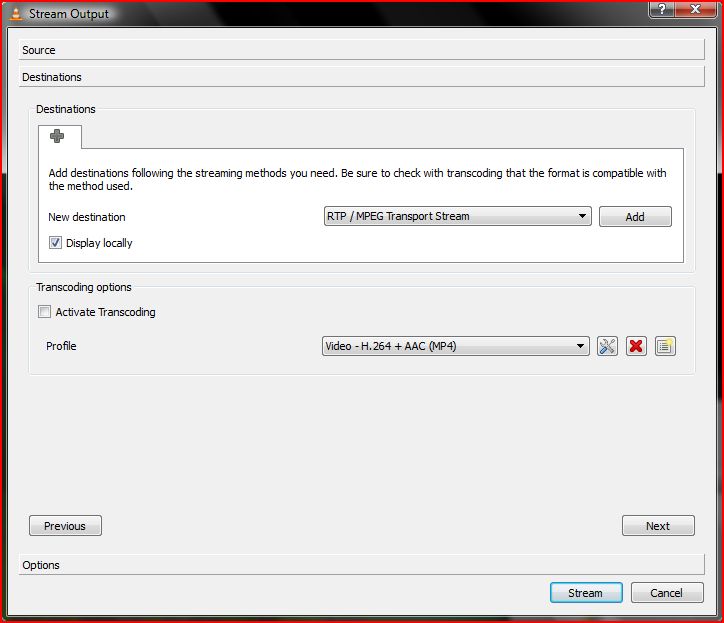
- Hit the "Stream" button at the bottom of the dialog. This pops up a new streaming options dialog. The streaming options dialog has 3 sections: Source, Destinations, and Options.
Source Dialog

Destinations
- Under Destinations, I selected "RTP / MPEG Transport Stream", since this is an awesome way to send data across the network (that's what RTP is all about).
- In my case, I want to see the movie both on the server and the client (it gives me warm fuzzies to see the movie in both places), so I check the "Display locally" checkbox
- Under "Transcoding options", I uncheck "Activate Transcoding" because I happen to know that my videos are already encoded just fine (and when I tried transcoding, that didn't seem to work so well for me)
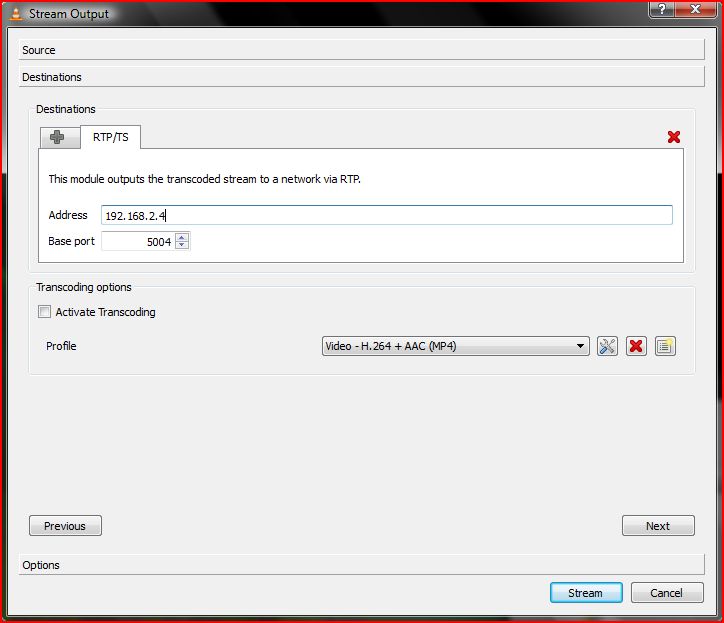
- Now click "Add". Specify the IP address of the client (in my case 192.168.2.4 - if you don't know what yours is, open a command prompt (cmd.exe), and run "ipconfig /all")
- Hit "Next" to go to the final options screen
Options
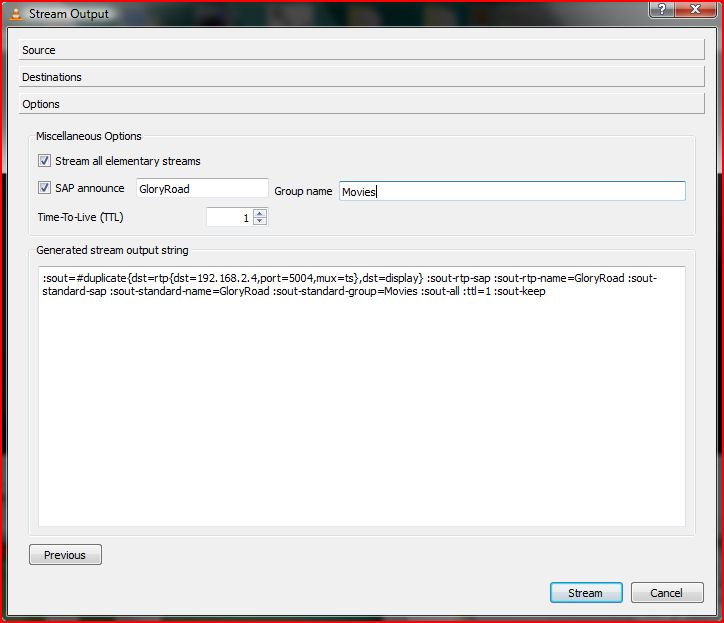
- Under "Options", I selected "Stream all elementary streams" (not completely necessary it turns out...this probably sends more than I really have to), and I also checked "SAP announce" and gave it a name (I chose the name of the video file...seemed logical) and a group name (doesn't seem to be all that important)
- Hit "Stream", and your movie should start playing locally (and it should start streaming)
CLIENT SETUP: Receiving the stream
Since I configured SAP in the server, it's easy to open the stream on the client: I just open up the media browser view of VLC (by clicking on the button next to the full screen button) and look under "Local network". I see the name of my SAP stream show up, and I double click it. Voila!! Streaming video! **Football style chest bump**
Note: you can start and stop the stream on the client, just as long as you don't catch up to the server. Pretty nice!


